Learn how to mark up documents such as PDFs and images on your Mac by using the Markup tools and your Apple Pencil or finger on a nearby iPhone or iPad.
Apple’s operating systems feature “Continuity” technologies that let nearby devices work better together, allowing you to do things like receive cellular phone calls on your Mac, pick up on right where you left off on another device, and so forth.
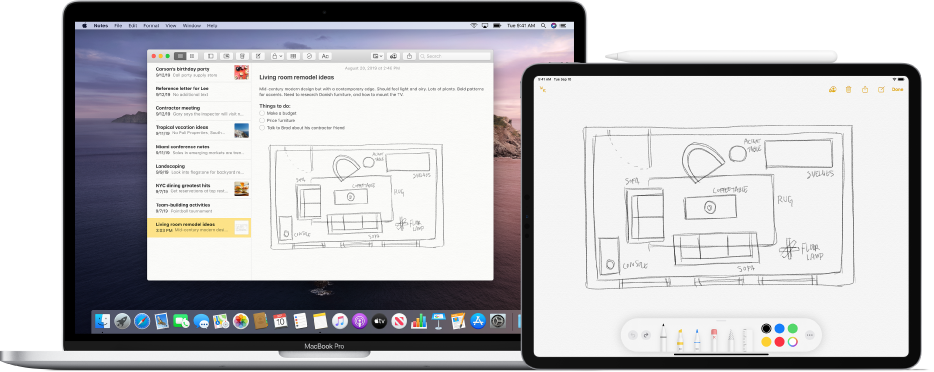
You can also draw a sketch using your nearby iOS device and have it appear instantly on your Mac right where you need it, like in an email message, a Message conversation, a document, or a folder. Apple calls it Continuity Sketch.
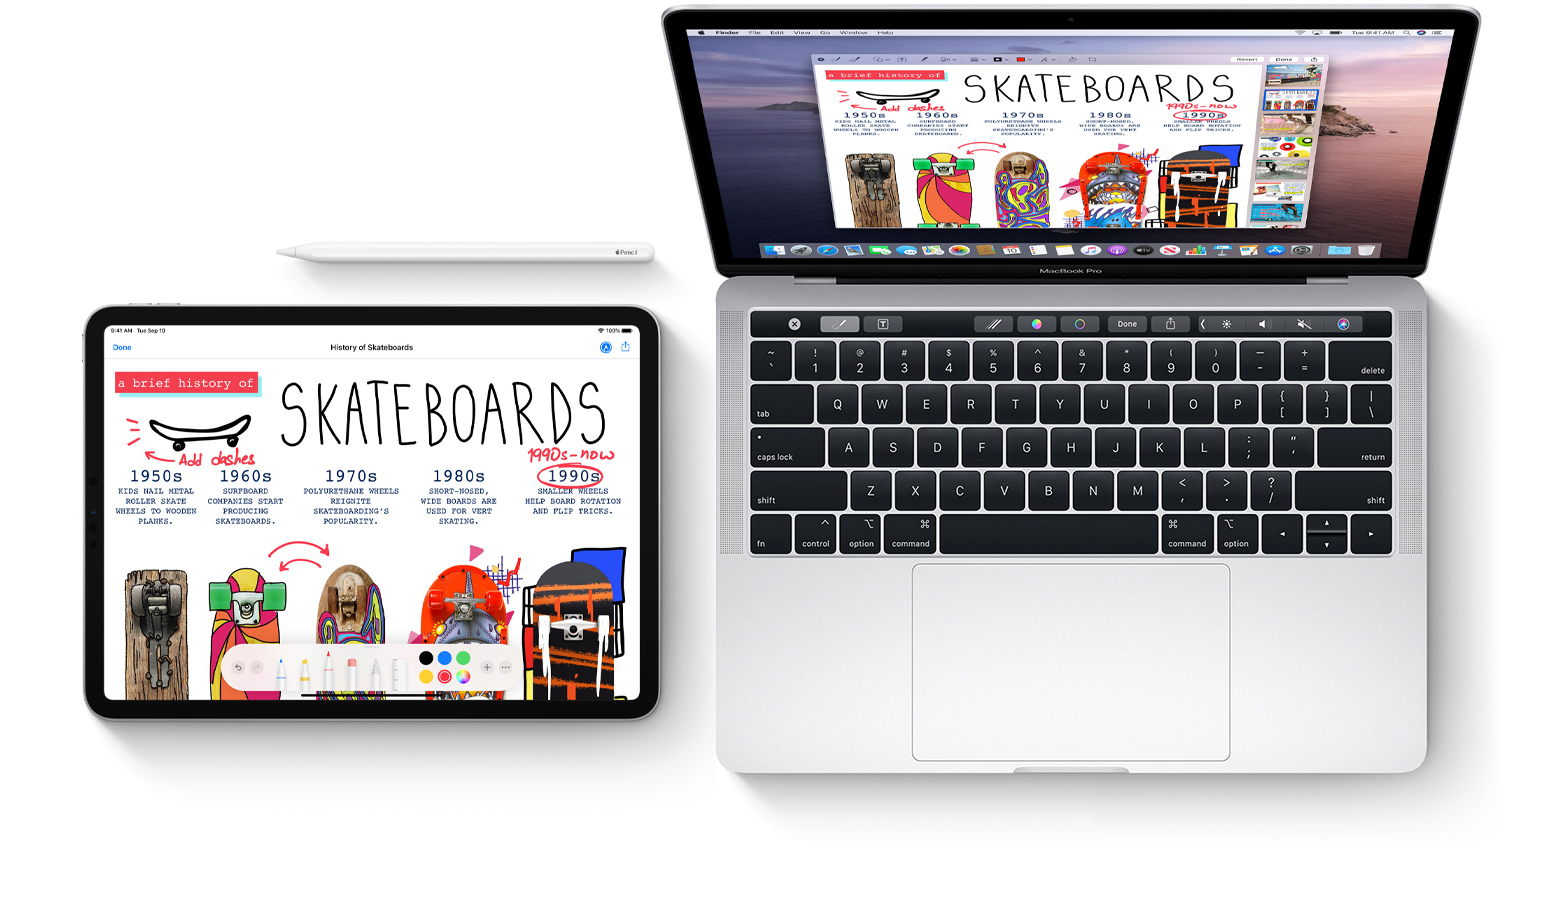
On top of that, you can also mark up a PDF document or image on your Mac with your Apple Pencil or finger using a nearby iOS device — a feature Apple calls Continuity Markup — with the changes appearing live on your Mac.
Continuity Markup lets you sign PDF documents, correct school projects or research papers, circle important details on images or screenshots, and more. Note that this feature doesn’t work with file types beyond PDF documents and images.
Continuity Markup system requirements
- iPhone 6S or newer or an iPad of comparable time
- 2o12 or newer Mac
- Enable both Wi-Fi and Bluetooth on the iOS device and the Mac
- Make sure you’re signed in to iCloud with the same Apple ID on both devices
How to mark up Mac documents using Continuity Markup
1) Open Finder and navigate to a folder with the PDF document or image you wish to mark up.
2) Select the PDF or image file and press the Space Bar to invoke the Quick Look preview window. After that, click the Markup button at the top of the Quick Look window.

Alternatively, you can right-click or control-click the PDF document or image file and choose Quick Actions > Markup.

3) Your Mac will reveal the markup toolbar at the top of the preview window. At the same time, the image or PDF will appear on your iPhone or iPad. However, if it does not, click the arrow next to the pencil icon and choose a device.

Note: If you want to edit using your iPad but Continuity Markup auto-activates on your iPhone, click the blue phone icon, followed by the pencil icon, and change to one of your other iOS devices.
4) With the markup window open on the selected iOS device, use your Apple Pencil or finger for freehand drawing or tap the plus button to use the markup tools for adding text, a handwritten signature, or vector shapes and arrows.
5) Every change made on the iOS device is reflected live on your Mac. When you’re finished marking up your content, click Done to close the markup window on the iOS device.

6) To save your annotations and other changes you just made to the PDF document or image, click the Done button in the preview window on your Mac (this action cannot be undone). Clicking the Revert button will disregard your annotations and revert to the original version.

Places you can mark up Mac documents
The ability to mark up Mac documents with your nearby iOS device is available in various Mac apps, including Mail, Notes, TextEdit, and Photos.
In Photos, click the three dots menu icon, followed by Markup.

In Mail, Notes, and Text Edit, you can insert a picture or PDF and use the arrow icon in the top right, followed by selecting Markup.
In Mail, you can also right-click and choose Insert Drawing. After that, click the pencil icon with an arrow to select one of your iOS devices.
Also see: How to use Continuity Camera